Saturday, 30 May 2015

Seriously Amazing Paper Pumpkin Kit


Aren't these cute! These were made using supplies in the Seriously Amazing Paper Pumpkin Kit. It was the August 2014 Paper Pumpkin kit but I received it recently as a prize from Stampin' Up! I got to pick which past kit I wanted and I choose this one because I really liked it.

This is all the stuff that was packed into that little orange box.


Every Paper Pumpkin kit comes with all you need to complete a project. Every month the project is different. Each kit includes an exclusive stamp set that is only available in that Paper Pumpkin kit. It also includes at least one ink spot, or miniature ink pad. No ink colour is repeated in a 12 month period so by being a Paper Pumpkin subscriber for a year would give you 12 different stamp sets and at least 12 different ink spots. It's a great way to get a collection of ink and stamps. Another advantage is that they are so small that you could fit a whole year's worth of ink spots and stamp sets in one of the orange boxes.

Here's a close up of the stamp set and ink spot in the Seriously Amazing kit.


There are supplies in the Seriously Amazing kit to make four 5 1/2 x 4 1/4 cards and four 3 1/4 x 2 1/4 cards, along with envelopes for all these cards. I played with the kit tonight and followed the instructions and made one of each size of the cards and envelopes.


I followed the instructions included in the kit to make these cards, but you don't have too and I'm always amazed at the creative ways others used the kit contents. I make a pinterest board for each Paper Pumpkin kit that I receive to collect ideas from others on how to use the kits in different ways. Here is a widget of my pinterest board for the Seriously Amazing kit.

Follow Jacqueline's board Seriously Amazing Paper Pumpkin kit on Pinterest.

As I said, the Seriously Amazing kit is a past kit, and as such is only available for purchase by people that are current subscribers to Paper Pumpkin. One of the perks of being a current subscriber is that you can purchase past kits, and you can also purchase refills of past kits. A refill is just like a full kit except that it doesn't include the stamp set or ink spot. If you get a kit that you really like you can get the supplies to make more, using the ink spot and stamps that you already have.

It is so much fun to have the little Orange box show up at your door each month. We actually have three kits come to our house. My adult daughter, my almost double digiter, and I each get our own kit so that we can have our own collection of inks and stamp sets to play with.

Stampin' Up! has a great special right now for new Paper Pumpkin Subscribers.


Click on Join Now! and you will be brought to a page with all the info you need to subscribe. You will receive the first two months for half price! It really is a deal that is too good to miss. You are free to cancel your subscription any time you want and if you ever receive a kit that you are not happy with, you can return it.

Hurry, though, this deal ends June 10. Also, if you sign up with me before June 2nd I will give you a roll of Designer Series Washi Tape.

I have been thinking that these kits would be great for a summer craft club for kids. I talked it over with my almost double digiter and she loves the idea. If you live near me and have a child that would be interested let me know asap. We'd love to set up a Summer Paper Pumpkin Club for Children in our community. If you don't live near me and you'd like more info on how to set up a Summer Paper Pumpkin Club near you, let me know and I'll help you set it up.

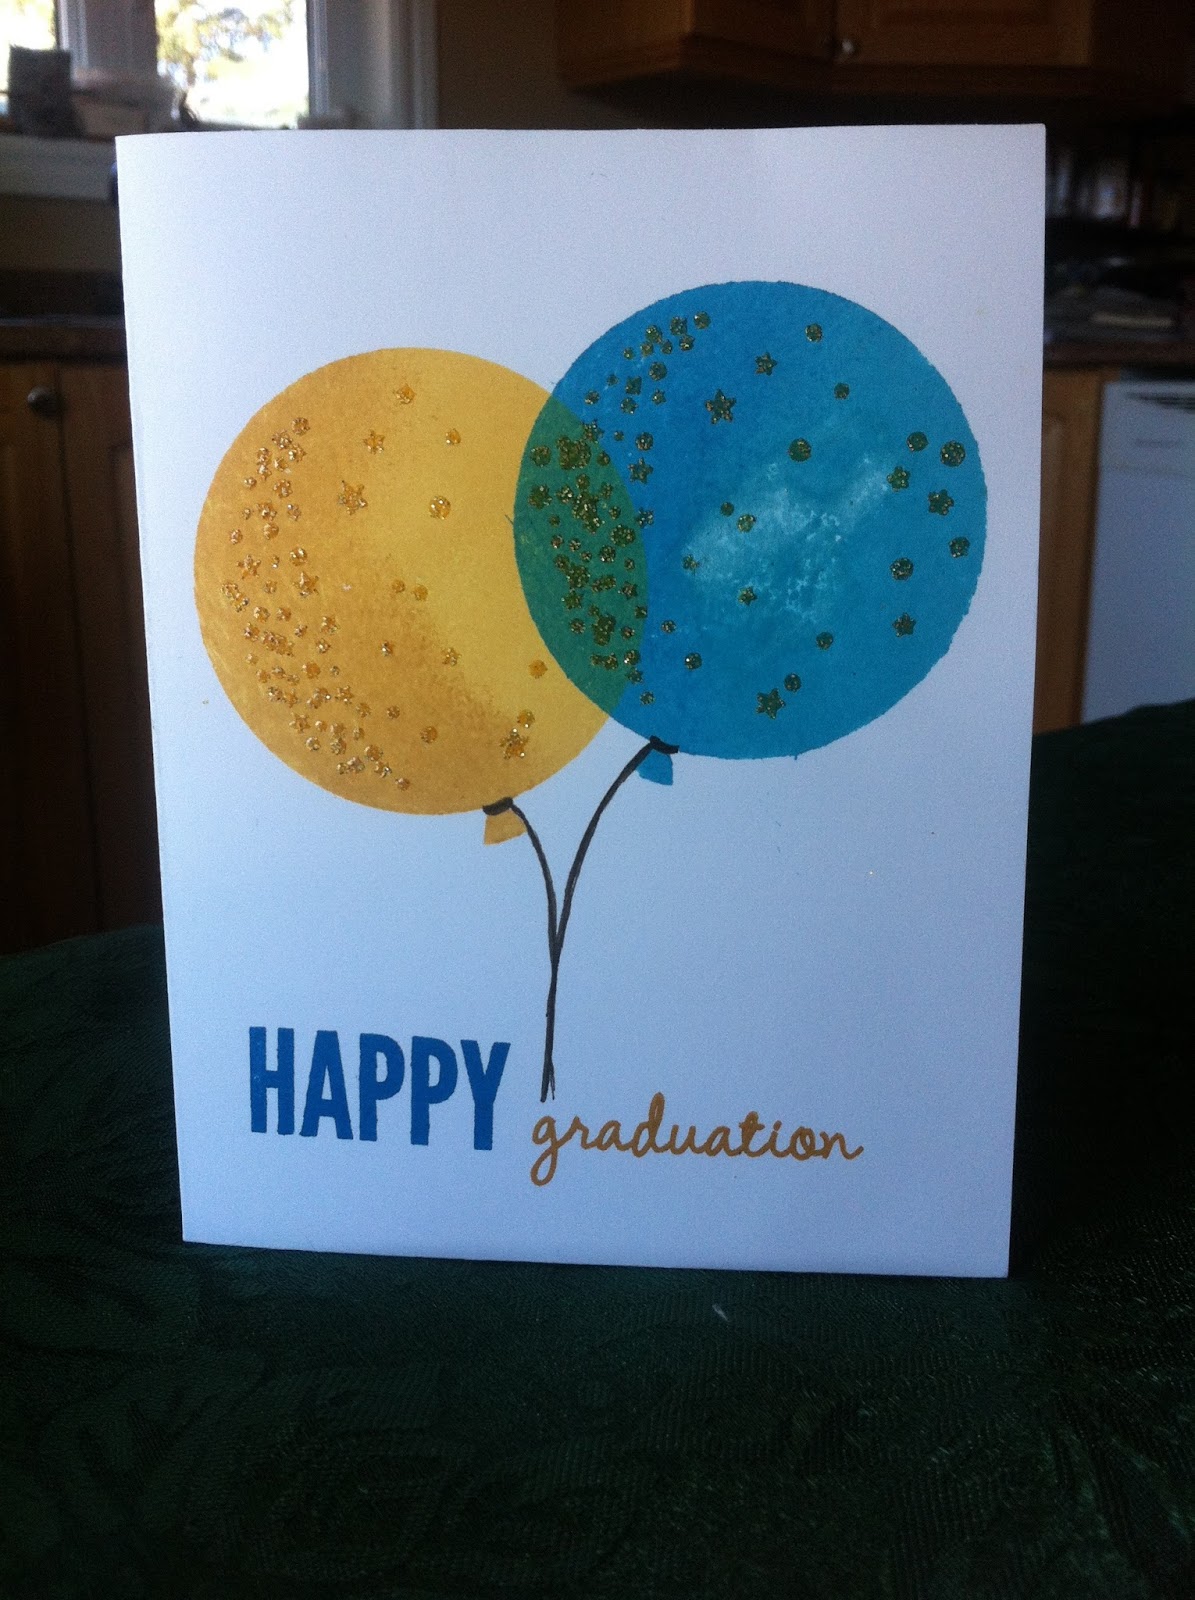
Friday, 29 May 2015

Graduation Celebration card


A simple one layer card created using stamps from the Celebrate Today stamp set.

The balloon were stamped two tone by inking the stamp first with the lighter colour and then sponging on a touch of the darker colour before stamping.

The stars on the balloon were stamped with Versamark and then sprinkled with Gold Emboss powder before heating with the heat tool.

Thursday, 28 May 2015

Watercolour with markers and water


Today I made use of another of the Works in Progress I posted about a little while back. I showed how I used the first one in my Waste not, want not post.

As I explained in my Works in Progress post, the focal point of this card was inspired by Heather Telford's Distress Stain Watercolour tutorial at SplitcoastStampers. I didn't have the stains, markers, or paper that she used in her tutorial, but I decided to try her techniques with the supplies that I had.

I started with a piece of Stampin' Up! Watercolour Paper. I used Stampin' Write Markers to ink up one of the stamps in the Butterfly Basics by colouring right onto the stamp. Then, before stamping on the watercolour paper, I gave the stamp a few sprays of water with my Stampin' Spritzer.

I cut the Watercolour Paper to 3 x 5 and scored it 1/4" all around to give it a little added punch.

I cut a 5 1/4 x 3 1/4 mat of Midnight Muse card stock and adhered the watercolour to it.

I created a 5 1/2 x 4 1/4 Summer Starfruit card base by cutting a 5 1/2 x 8 1/2 piece and then scoring and folding it at 4 1/4. I adhered the matted watercolour to the card base.

I cut a 1 1/2 x 4 1/4 piece of Window Sheet and stamped a greeting from the All Shook Up Paper Pumpkin kit onto it with VersaMark. Then I sprinkled that with Gold Emboss powder before heating it with my Heat Tool. I adhere this to the card by hiding Mini Glue Dots under the letters and putting a little strip of Snail down the right side of the window sheet and down the middle where I knew the ribbon would cover it on the left.

I cut a 6" piece of ribbon, wrapped it around and adhered it inside the card with snail. I cut a 3" piece of ribbon and tied it in a knot on the ribbon at the front of the card.

The ribbon, markers, and card stock I used on this card are all from the 2012-2014 In-Colour Collection and are no longer available but you can find similar colours in the other Colour Collections.

Because the All Shook Up Paper Pumpkin kit is a past it it is now only available to current subscribers. One of the perks of being a Paper Pumpkin Subscriber is that you can purchase past kits. Now is a great time to become a Paper Pumpkin Subscriber. Until June 10 new subscribers get their first two kits for half price! You can not get the All Shook Up kit for half price but you can get the upcoming June and July kits for half price, and then order the All Shook Up kit for full price. Join Now!

Wednesday, 27 May 2015

Simple card with matching envelope


A fast, simple card today. Can't seem to get the time or the mojo to do much more than that at the moment.

Remember when I told you I got the New Catalogue, new product? This simple card is made using stamps from this new hostess set in the new catalogue.


This set is one of five stamp sets that are only available to hosts. It is a very pretty set and I'd love to help you become eligible to purchase it. Invite some friends over and I'll come show you all how to make this card, along with some others, and you'll be able to purchase this stamp set.

The ink I used for the card above is one of the new In Colour inks. Here are all of the new In Colour ink pads, card stock, embellishments and envelope paper.


Yes, I said envelope paper. Envelope Paper is a new product coming in the new catalogue. I used my Envelope Punch Board and a sheet of the Envelope Paper to make the envelope pictured with the card above.

The new catalogue will going live online June 2nd, and this is just a small sample of some of the great product that will be available.

If you are interested in receiving a physical copy of the new catalogue let me know.

For the card above I simply stamped the image with Watermelon Wonder and then used my blender pen to draw some colour from the stamped image into the flower. So simple, and yet so nice.


Tuesday, 26 May 2015

Finding a new purpose


A few posts ago, in my Butterfly Decorations and Stands post, I posted a picture of a few elements that I was hoping to use in cards soon. I made use of one of them in this card. The stamped image was one I made when I was working on my Blue Morpho card, thinking I would use it as the background for the Blue Morpho butterfly, but when I went to place the butterfly on the card I didn't like how the butterfly covered up the beautiful flowers and ferns. I decided to use a different background for the butterfly and laid this piece aside for another time. Tonight was the time.

I stamped the flowers and ferns with Pistachio Pudding using stamps from the Butterfly Basics stamp set. I used my Blender Pens and Pistachio Pudding, Strawberry Slush, and Crushed Curry ink pads to fill in the leaves and add some colour to the flowers. I stamped the greeting using another one of the stamps from the Butterfly Basics stamp set and Crushed Curry ink.

I decided to tear the edges of the whisper white card stock to give it a soft look and tied a piece of Crushed Curry ribbon across the bottom before attaching it to a Strawberry Slush mat and then to a Pistachio Pudding card base.

I added a couple of Pearls for a little extra punch.

**Strawberry Slush and Pistachio Pudding were part of the 2013-2015 in Colours so will no longer be available after June 2. Melon Mambo and Wild Wasbi could be used in their place.

Monday, 25 May 2015

New Catalogue, new product


The Stampin' Up! 2015-2016 Annual Catalogue arrived at my door today, along with a few goodies that I had ordered from it. The catalogue will be available online for the general public on June 2, but demonstrators got a sneak peek of the catalogue earlier and were allowed to order some of the new product.

I didn't have much time to play today, but I had to try the punch and stamp set that I had ordered. Here's what I made


Using this punch and stamp set


This stamp set is actually extra special because it is the 2015-2016 Ronald McDonald House Charity (RMHC) stamp set. Each year Stampin' Up! designs an exclusive stamp set that is dedicated the RMHC stamp set and a portion of the sale of that set is donated to RMHC. I'm looking forward to play with this set some more, when I get more time to play.


Saturday, 23 May 2015

Waste not, want not


Some might think it's weird, but the first work of my three works in progress pieces that I decided to make use of is the one that turned out the worse. I almost threw this watercolour piece in the garbage, but I'm glad I didn't. I like how it turned out.

As I explained in my Works in Progress post, the focal point of this card was inspired by Heather Telford's Distress Stain Watercolour tutorial at SplitcoastStampers. I didn't have the stains, markers, or paper that she used in her tutorial, but I decided to try her techniques with the supplies that I had.

I started with a piece of Stampin' Up! Watercolour Paper. I used Stampin' Write Markers to ink up one of the stamps in the Butterfly Basics by colouring right onto the stamp. Then, before stamping on the watercolour paper, I gave the stamp a few sprays of water with my Stampin' Spritzer. Unfortunately I sprayed it a bit too much and a bit too close causing the image to totally lose it's definition when I stamped it. I was bummed, but I recognized what I had done wrong and decided to try again, but I also decided to keep this particular piece and see if I could redeem it some how.


The more I looked at the piece, the more it grew on me and I finally came up with a plan. I cut the watercolour piece to 4 x 5 1/4.

I cut another 1 x 2 piece of watercolour paper for the sentiment. Using Baked Brown Sugar I inked up one of the stamps from Butterfly Basics stamp set and I misted it just a touch with my Stampin' Spritzer before stamping it.

I cut a 1 1/4 x 2 1/4 piece of Summer Starfruit card stock and adhered the stamped greeting to it.

I cut a 6" piece of ribbon and adhered the matted greeting to it before adhering the ribbon around the watercolour piece.

I cut a 4 1/4 x 11 piece of Primrose Petals and scored it at 5 1/2 to make the card base and adhered the watercolour piece to the base.

I decided to add three Pearl Basic Jewel Embellishments as an extra touch but it still seemed to be missing something. I didn't like how the flowers lacked detail so I decided to add some details with my Dazzling Details. It was the finishing touch I was looking for.

The colours I used in this card are all past In Colors and are no longer available, but comparable colours can be found in the current Stampin' Up! Colours Collections.