Showing posts with label Envelope Punch Board. Show all posts

Saturday, 20 June 2015

A Wallet Card for Dad for Father's Day


Earlier this week I came across a neat Wallet Card on the "You're Filling Dad's Wallet?" post on the Chaos Served Daily Blog. I loved it, but I didn't have the clear embossing powder that she used. I mulled it over a bit and decided to combine her wallet design with the Faux Stamped Leather technique I shared on my "Leather Look for a Man or Woman" post earlier this week. It makes a great Father's Day card, and it can hold money, gift cards, or photo cards, or all three.


First I cut a piece of 3 x 8 1/2 piece of Early Espresso card stock and scored it at 4 1/4. I stamped a stamp from the Lovely as a Tree stamp set and a stamp from the April 2015 Love You a Lot Paper Pumpkin kit using Memento on the card front. I placed the cardstock on my Stampin' Pierce Mat and, because I don't have a stylus yet, I used the point of an empty mechanical pencil to trace around both images.


Next I lightly sponged over the card front with the following four colours in this order - Hello Honey, Pumpkin Pie, Tip Top Taupe, and Baked Brown Sugar.


I rounded the corners with my Envelope Punch Board.


I decided the edges of the card front needed more definition so I sponged around them with Early Espresso, but because I don't have an Early Espresso ink pad, I used my Early Espresso Stampin' Write Marker and scribbled over the top of a clear block, before using a Stampin' Sponge to pick up the ink and sponge it around the edge of the card.


With the card front still on the Stampin' Pierce Mat I used my Paper-Piercing Tool and a stencil from the Essentials Paper Piercing Pack to pierce all around the edge of the card front. I free handed the piercing on the card I featured a in the Faux Leather post earlier this week and it's okay, but I like the look of the piercing with the stencil better.


Next, following the instructions on the blog I linked in the opening of this post, I cut more pieces of Early Espresso for the inside of the card
- one piece 2 1/2 x 8
- 2 pieces 2 x 3 3/4
- 2 pieces 1 1/2 x 3 3/4
I sponged all around the edges of these pieces with Baked Brown Sugar, and did some extra sponging in the middle of the smallest pieces.


Using Memento ink and stamps from the April 2015 Love You a Lot Paper Pumpkin kit, I stamped greetings on the smallest pieces, giving them more of a leather look.


Using my 2-Way Glue Pen I adhered the stamped smaller pieces to the bigger pieces just around the sides and the bottom, making little pockets.


I scored the 2 1/2 x 8 piece at 4 with my Stampin' Trimmer scoring blade.


Then I adhered the pockets to this piece, just along the bottom and sides, making more pockets.

I decided to pierce around the edges of these pieces before adhering the whole thing to the inside of the card, once again just along the bottom and the sides, making one big pocket, like the bill pocket in a wallet. I left a small space on each side of the middle bottom without any adhesive so that the wallet would open and shut right. When I adhered it I folded the middle piece and placed it just on one side of the inside card and folded the card over the middle, instead of placing it flat out, to help it fit right for opening and closing and putting things in. (I hope that makes sense). I left it a while to let the glue set.  This is what it looks like opened up.


Sadly I adhered the inside part up from the bottom a little too much so bills stick up over the top a little when you put them in, but it's not too bad. If/when I do it again I will adhere it down a little further so bills fit better.


I am planning to get some gift cards to put in the other pockets, and I made some photo cards of our children to fit in them. I used my Pages program to get the photos the size I wanted, 2 1/4 x 3 1/4, printed them on cardstock, cut them and rounded the corners with my envelope punch board.


It was a bit of work, but I really enjoyed working on this card. It is a great card to make for a male any time of the year.

Monday, 1 June 2015

Simple, functional bookmark


I made these bookmarks tonight to give to my guests at Stampin' Up! Open Houses across Newfoundland this week. It's going to be a busy week!

At the events, guests will receive a copy of the 2015-2016 Stampin' Up! Annual Catalogue. I heard that demonstrators often make bookmarks to give to their customers along with their catalogues, so I set of to research what these bookmarks might look like. I've seen some beautiful bookmarks during my research.

I've been debating with myself for weeks about the design of my bookmarks. Should I go for function or beauty? Should I feature the new In-Colours? Should I feature a new stamp set, maybe the RMHC stamp set? Should I use some punches, dies, layers?

I finally decided that I would make my bookmarks functional. The purpose of the bookmark is to mark pages and help you find your favourite things, so I decided to go with a "These are a few of my Favourite Things" theme.

I decided to make one side of the bookmark a wish list with space for customers to record their favourite things, along with the pages they are found on.

The other side of the bookmark contains my contact information so that they can easily contact me with any questions.

Using the word processing program on my printer, I played around with textboxes and placement until I had something that worked. I printed that on Whisper White Cardstock and then cut the bookmarks. They measure 2 x 8 1/2. Then I used the Tag Topper Scalloped Punch on the top and rounded the bottom edges using the Envelope Punch Board.

Stamps from two of my favourite stamp sets (Butterfly Basics and Lovely as a Tree) were used in the design of the bookmarks, and I also used one of my favourite techniques - sponging. I tied a 6 inch piece of my favourite colour lace to the top of the bookmark for the final touch.

The 2015-2016 will go live online tomorrow, so be sure to check it out. If you would like to have a paper copy of the catalogue, along with one of my bookmarks, let me know.

Saturday, 16 May 2015

Fluttering Butterflies Birthday Card


So, it didn't come out quite like I had it pictured it my head, but it's not too bad. Don't forget to check out the video at the bottom to see the butterflies flutter out of the card when you open it.

While browsing recently I came across the Floating Butterflies Video and I just had to try it. I didn't have some of the supplies she used in the video so I improvised.

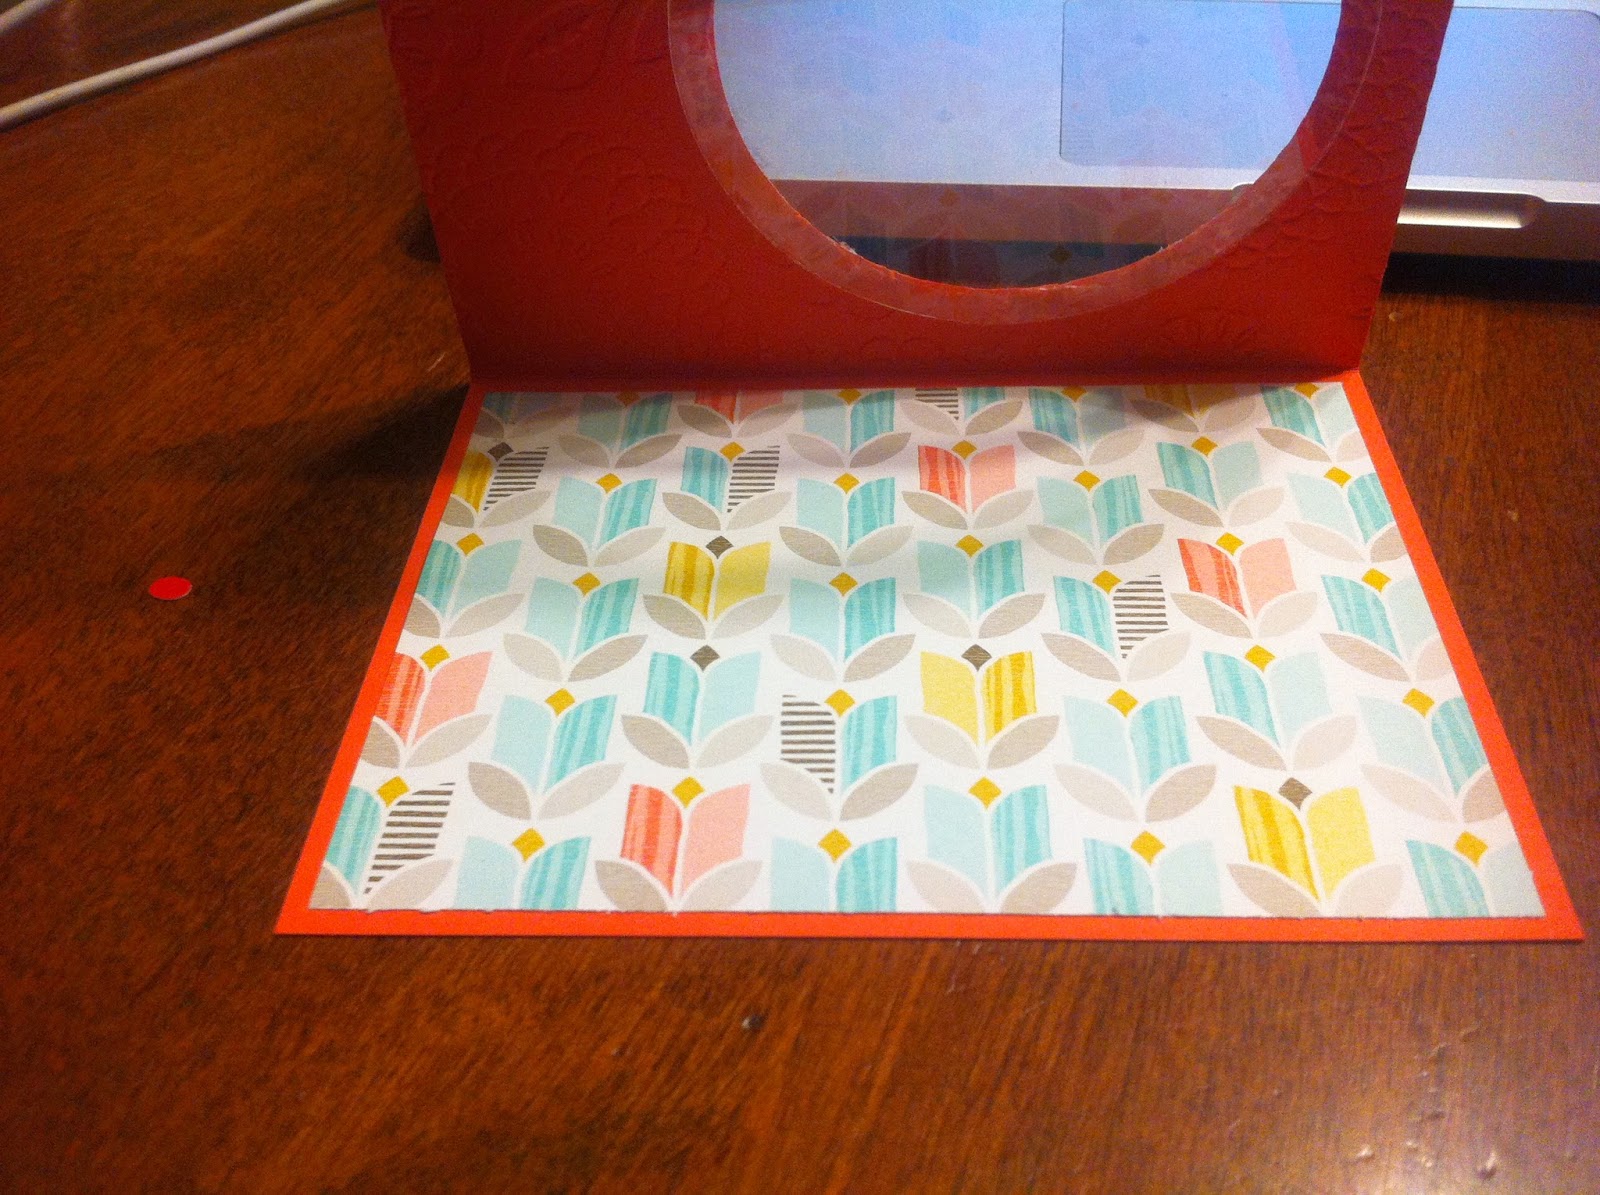
I made a card base by scoring an 8 1/2 by 5 1/2 piece of Calypso Coral at 4 1/4.  I used my Big Shot and the 3 3/16 die from the Circles Collection Framelits to cut a hole in the card front.


I used my Texture Boutique and the Lovely Lace embossing folder to give texture to the card front.


I used my Big Shot and the 3 5/8" die from the Circles Collection Framelits to cut 2 circles out of a Window Sheet. I adhered one of this circles to the inside of the cut out circle shape in the card front.


The other window sheet circle I cut spirally.


I cut a 5 1/4 x 4 sheet of Best Year Ever DSP (a Sale-a-Bration item which is no longer available for purchase) and adhered it to the inside of the card base.


Sadly, I didn't take pictures of the rest of the process, so I just have to try to describe it to you.

I stamped a greeting inside using Baked Brown Sugar and one of the stamps from the Butterfly Basics stamp set.

I stamped the outside greeting on a 1 x 3 piece of whisper white cardstock using Coastal Cabana and one of the stamps from the Butterfly Basics stamp set. I made a mat for it out of a 1 1/4 x 3 1/4 piece of Crushed Curry. I rounded the corners of both pieces using the corner rounder on my Envelope Punch Board before adhering to two together then adhering them to the cardfront.

I put a glue dot, actually two glue dots, on the outside end of the spiral and adhered it to the outside edge of the back of the front of the card. Sounds confusing.  I had to stop typing and go take a picture of the finished card to show you what I mean.


Then I lay the spiral flat on the card front and put a glue dot right in the center of it before closing the card so that the center stuck to the patterned paper inside the card.  I wish I had taken a picture to show you, and it kind of hard to see it with the card all put together. If you watch the video I linked above you will understand.

I used my Big Shot and the smallest butterfly die from the Butterfly Thinlits to cut butterflies out of the Best Year Ever DSP.


I used glue dots to adhere the butterflies at different points along the spiral cut window sheet that was adhered to the card. When you open the card, the butterflies appear to fly.


I adhered one of the butterflies to the front of the card.

Here's a video showing how it looks opening up.

Friday, 10 April 2015

Finally, Cluster Stamping Success!


The Try a New Technique challenge at SplitcoastStampers this week was to try Cluster Stamping. The instructions were to create a stencil with a die or punch. place the stencil over a cardbase, and then select some small stamps to stamp through the stencil onto the cardbase to create a cluster.

I cheated a little. I didn't stamp right onto my cardbase, but onto a piece of cardstock. I actually didn't notice that the challenge said specifically to stamp on a cardbase until just now. Oh well.

As soon as I read this challenge I knew I had to try it. I had it all figured out in my head and couldn't wait to try it. Well, things didn't quite go as I thought they would. I was not impressed with my first attempt. But I wasn't willing to give up. Yesterday I posted a picture in my blog post that showed some of my attempts to conquer the technique. After much experimenting I finally had success!

I used my big shot and one of the dies from the Circles Collection Framelits Die to cut the stencil out of plain typewriter paper. I had tried using cardstock for my stencil but it didn't work as good as the thinner typewriter paper. The stamps didn't stamp as good right around the edge, but the typewriter paper worked fine.


I decided to use stamps from a number of different sets - 


I placed my stencil over my cardstock and set up my stamps and inks, all ready to go to work.


I decided to go with the 2013-2015 colours for the card, because I just love this colour collection! And I love how it turned out!


I decided to round the corners of the cardstock using my envelope punch board.


I decided that it still needed something when I was done so I stamped the little stamp in each corner. The button and ribbon are from the Best Year Ever Accessory pack, which was a Sale-a-Bration item and is no longer available for purchase. The colour looks a bit off in the picture but the ribbon and button are actually Coastal Cabana, one of the 2013-2015 In Colours.

Though I struggled a bit with this technique, I do think I will use it again. It was fun experimenting with it.

If you're interested in trying this fun technique let me know and we'll set something up.

A quick last minute reminder that today is the last day for Stampin' Up!s free shipping promotion and it's also the last day to subscribe for Paper Pumpkin in time to receive this month's kit. Let me know if you need help placing an order.