Showing posts with label Circles Collection Framelits die. Show all posts

Monday, 18 May 2015

Butterfly decorations and stands


I've been playing, and I'm thinking some of these elements may find their way onto cards on my blog sometime this week, but for now, check out those butterflies in the background. Here, I'll give you a closer look.


Isn't that pretty! I read on a forum somewhere this week how someone adhered three butterflies together, placed a circle on top, and used it to hold a cupcake! I had to try it out. I decided to use the swallow tail butterfly thinlit from the Butterfly Thinlits, and that probably wasn't the smartest because the tails are not that strong. I did cut a scalloped circle using the framelit from the Circles Collection framelits and just laid it on top and tried somethings on it, but it wouldn't hold much at all.


It does look cute though. I may try it again with the other butterfly framelit, as I'm thinking that one might hold more, or I may try cutting the tails off this one to see if it can hold more that way.

I decided to try it with four butterflies, instead of three, to see if that would make it a bit stronger, and I decided to use two different colours this time.


I place the scalloped circle on top of that too, but it still couldn't hold much. Looks cute though.


And the colours you see depend on the angle you look at it from.


I think these make cool decorations even if they can't hold anything. I may play with it some more yet. We'll see. I'd love to hear if you try it and see what you do with it.

Saturday, 16 May 2015

Fluttering Butterflies Birthday Card


So, it didn't come out quite like I had it pictured it my head, but it's not too bad. Don't forget to check out the video at the bottom to see the butterflies flutter out of the card when you open it.

While browsing recently I came across the Floating Butterflies Video and I just had to try it. I didn't have some of the supplies she used in the video so I improvised.

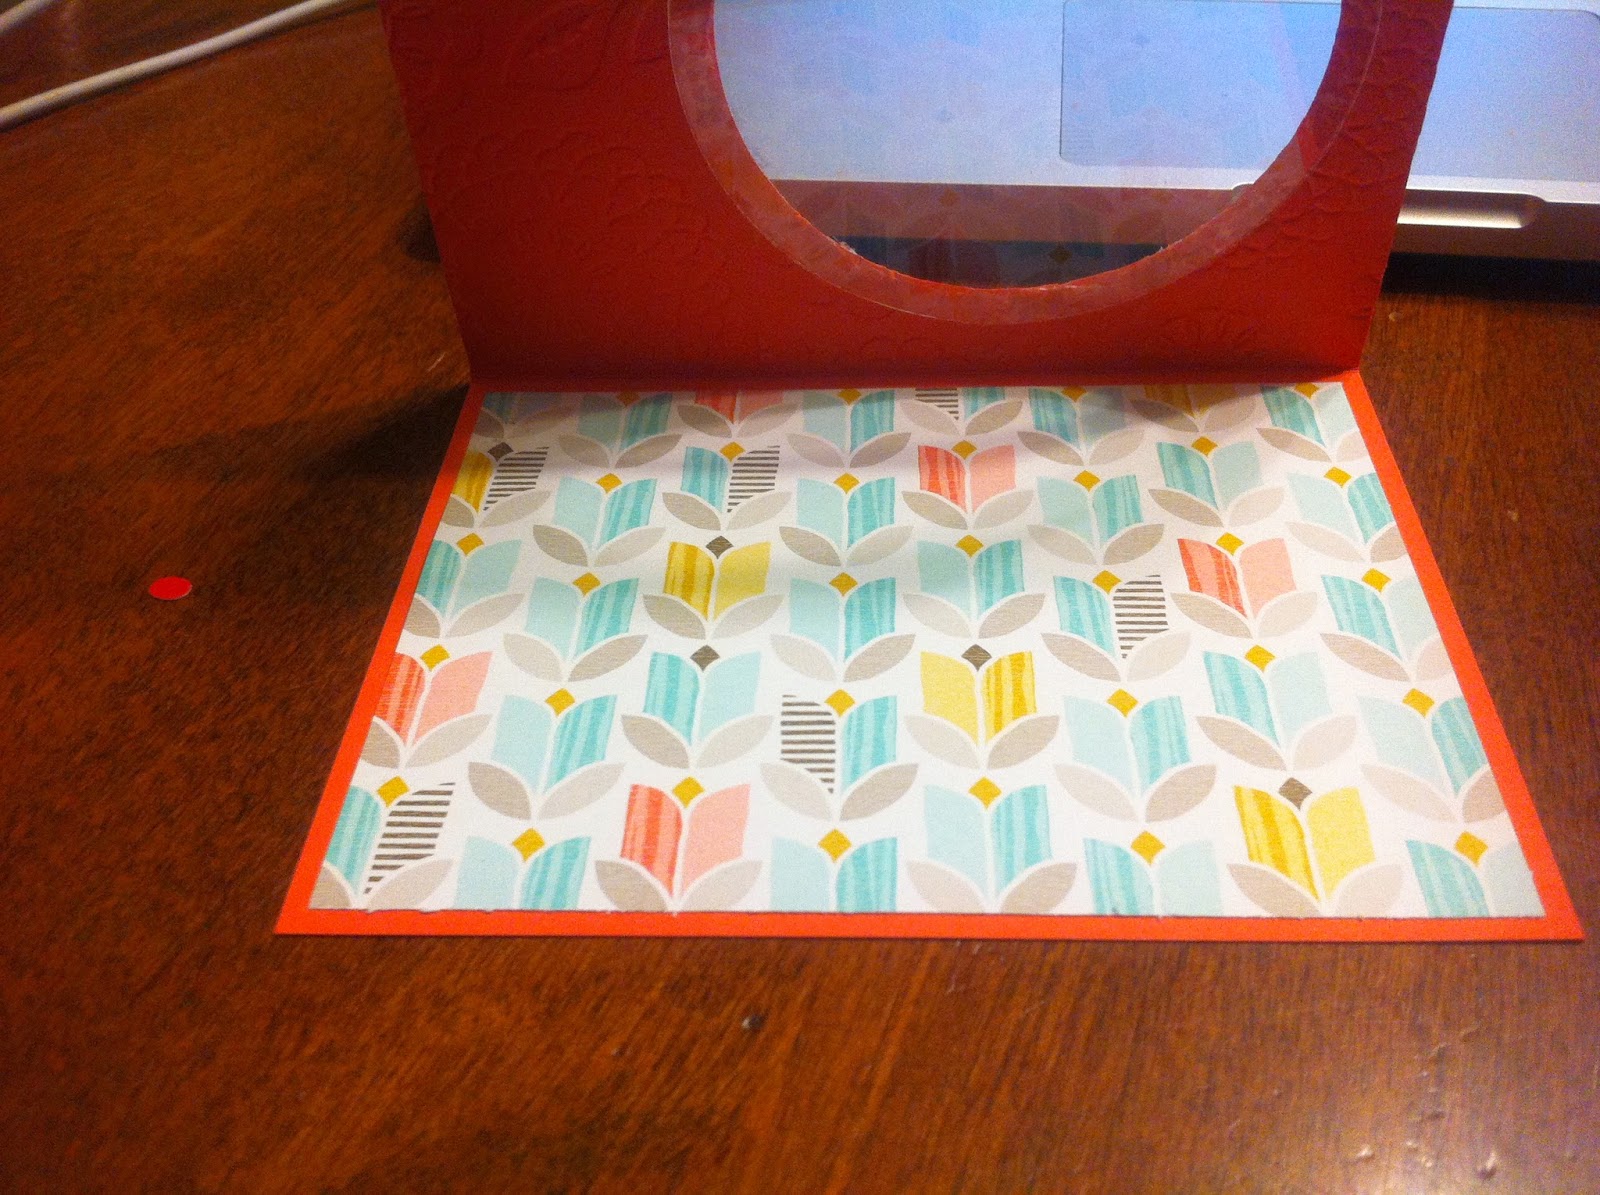
I made a card base by scoring an 8 1/2 by 5 1/2 piece of Calypso Coral at 4 1/4.  I used my Big Shot and the 3 3/16 die from the Circles Collection Framelits to cut a hole in the card front.


I used my Texture Boutique and the Lovely Lace embossing folder to give texture to the card front.


I used my Big Shot and the 3 5/8" die from the Circles Collection Framelits to cut 2 circles out of a Window Sheet. I adhered one of this circles to the inside of the cut out circle shape in the card front.


The other window sheet circle I cut spirally.


I cut a 5 1/4 x 4 sheet of Best Year Ever DSP (a Sale-a-Bration item which is no longer available for purchase) and adhered it to the inside of the card base.


Sadly, I didn't take pictures of the rest of the process, so I just have to try to describe it to you.

I stamped a greeting inside using Baked Brown Sugar and one of the stamps from the Butterfly Basics stamp set.

I stamped the outside greeting on a 1 x 3 piece of whisper white cardstock using Coastal Cabana and one of the stamps from the Butterfly Basics stamp set. I made a mat for it out of a 1 1/4 x 3 1/4 piece of Crushed Curry. I rounded the corners of both pieces using the corner rounder on my Envelope Punch Board before adhering to two together then adhering them to the cardfront.

I put a glue dot, actually two glue dots, on the outside end of the spiral and adhered it to the outside edge of the back of the front of the card. Sounds confusing.  I had to stop typing and go take a picture of the finished card to show you what I mean.


Then I lay the spiral flat on the card front and put a glue dot right in the center of it before closing the card so that the center stuck to the patterned paper inside the card.  I wish I had taken a picture to show you, and it kind of hard to see it with the card all put together. If you watch the video I linked above you will understand.

I used my Big Shot and the smallest butterfly die from the Butterfly Thinlits to cut butterflies out of the Best Year Ever DSP.


I used glue dots to adhere the butterflies at different points along the spiral cut window sheet that was adhered to the card. When you open the card, the butterflies appear to fly.


I adhered one of the butterflies to the front of the card.

Here's a video showing how it looks opening up.

Friday, 10 April 2015

Finally, Cluster Stamping Success!


The Try a New Technique challenge at SplitcoastStampers this week was to try Cluster Stamping. The instructions were to create a stencil with a die or punch. place the stencil over a cardbase, and then select some small stamps to stamp through the stencil onto the cardbase to create a cluster.

I cheated a little. I didn't stamp right onto my cardbase, but onto a piece of cardstock. I actually didn't notice that the challenge said specifically to stamp on a cardbase until just now. Oh well.

As soon as I read this challenge I knew I had to try it. I had it all figured out in my head and couldn't wait to try it. Well, things didn't quite go as I thought they would. I was not impressed with my first attempt. But I wasn't willing to give up. Yesterday I posted a picture in my blog post that showed some of my attempts to conquer the technique. After much experimenting I finally had success!

I used my big shot and one of the dies from the Circles Collection Framelits Die to cut the stencil out of plain typewriter paper. I had tried using cardstock for my stencil but it didn't work as good as the thinner typewriter paper. The stamps didn't stamp as good right around the edge, but the typewriter paper worked fine.


I decided to use stamps from a number of different sets - 


I placed my stencil over my cardstock and set up my stamps and inks, all ready to go to work.


I decided to go with the 2013-2015 colours for the card, because I just love this colour collection! And I love how it turned out!


I decided to round the corners of the cardstock using my envelope punch board.


I decided that it still needed something when I was done so I stamped the little stamp in each corner. The button and ribbon are from the Best Year Ever Accessory pack, which was a Sale-a-Bration item and is no longer available for purchase. The colour looks a bit off in the picture but the ribbon and button are actually Coastal Cabana, one of the 2013-2015 In Colours.

Though I struggled a bit with this technique, I do think I will use it again. It was fun experimenting with it.

If you're interested in trying this fun technique let me know and we'll set something up.

A quick last minute reminder that today is the last day for Stampin' Up!s free shipping promotion and it's also the last day to subscribe for Paper Pumpkin in time to receive this month's kit. Let me know if you need help placing an order.